


Yesterday I reached a milestone in my #100DaysOfCode journey: I successfully completed a Bankist app project that took some time to complete. It is from Jonas Schmedtmann's JavaScript course on Udemy, which I highly recommend to anyone wanting to learn or just hone their skills with some interesting projects using JavaScript. This project involved many components including creating DOM elements, data transformations including map, filter and reduce, and Internationalization of date objects and timers.
First as a disclaimer, I should mention that the HTML/CSS for this project was already written when I started it, as in, I did not code any of the UI or components, but I did write the functionality as part of the tutorial, so I wanted to share my thoughts about the process and how to achieve similar results for my fellow #CodeNewbies.
To start out with, Jonas put together a flow chart/pseudocode to explain the steps needed to accomplish the tasks that made up the project. This is a fundamental part of any program and is arguably the most important because it provides a sort of road map to accomplish the tasks and breaks down each component into smaller, more manageable tasks. In short, a flow chart and/or pseudocode sets up the framework of the app and general steps needed to follow in order to complete the project. Think of it this way: you wouldn't start constructing a building by just putting down bricks and beams. Planning is everything. The flow chart for this project looked like this:
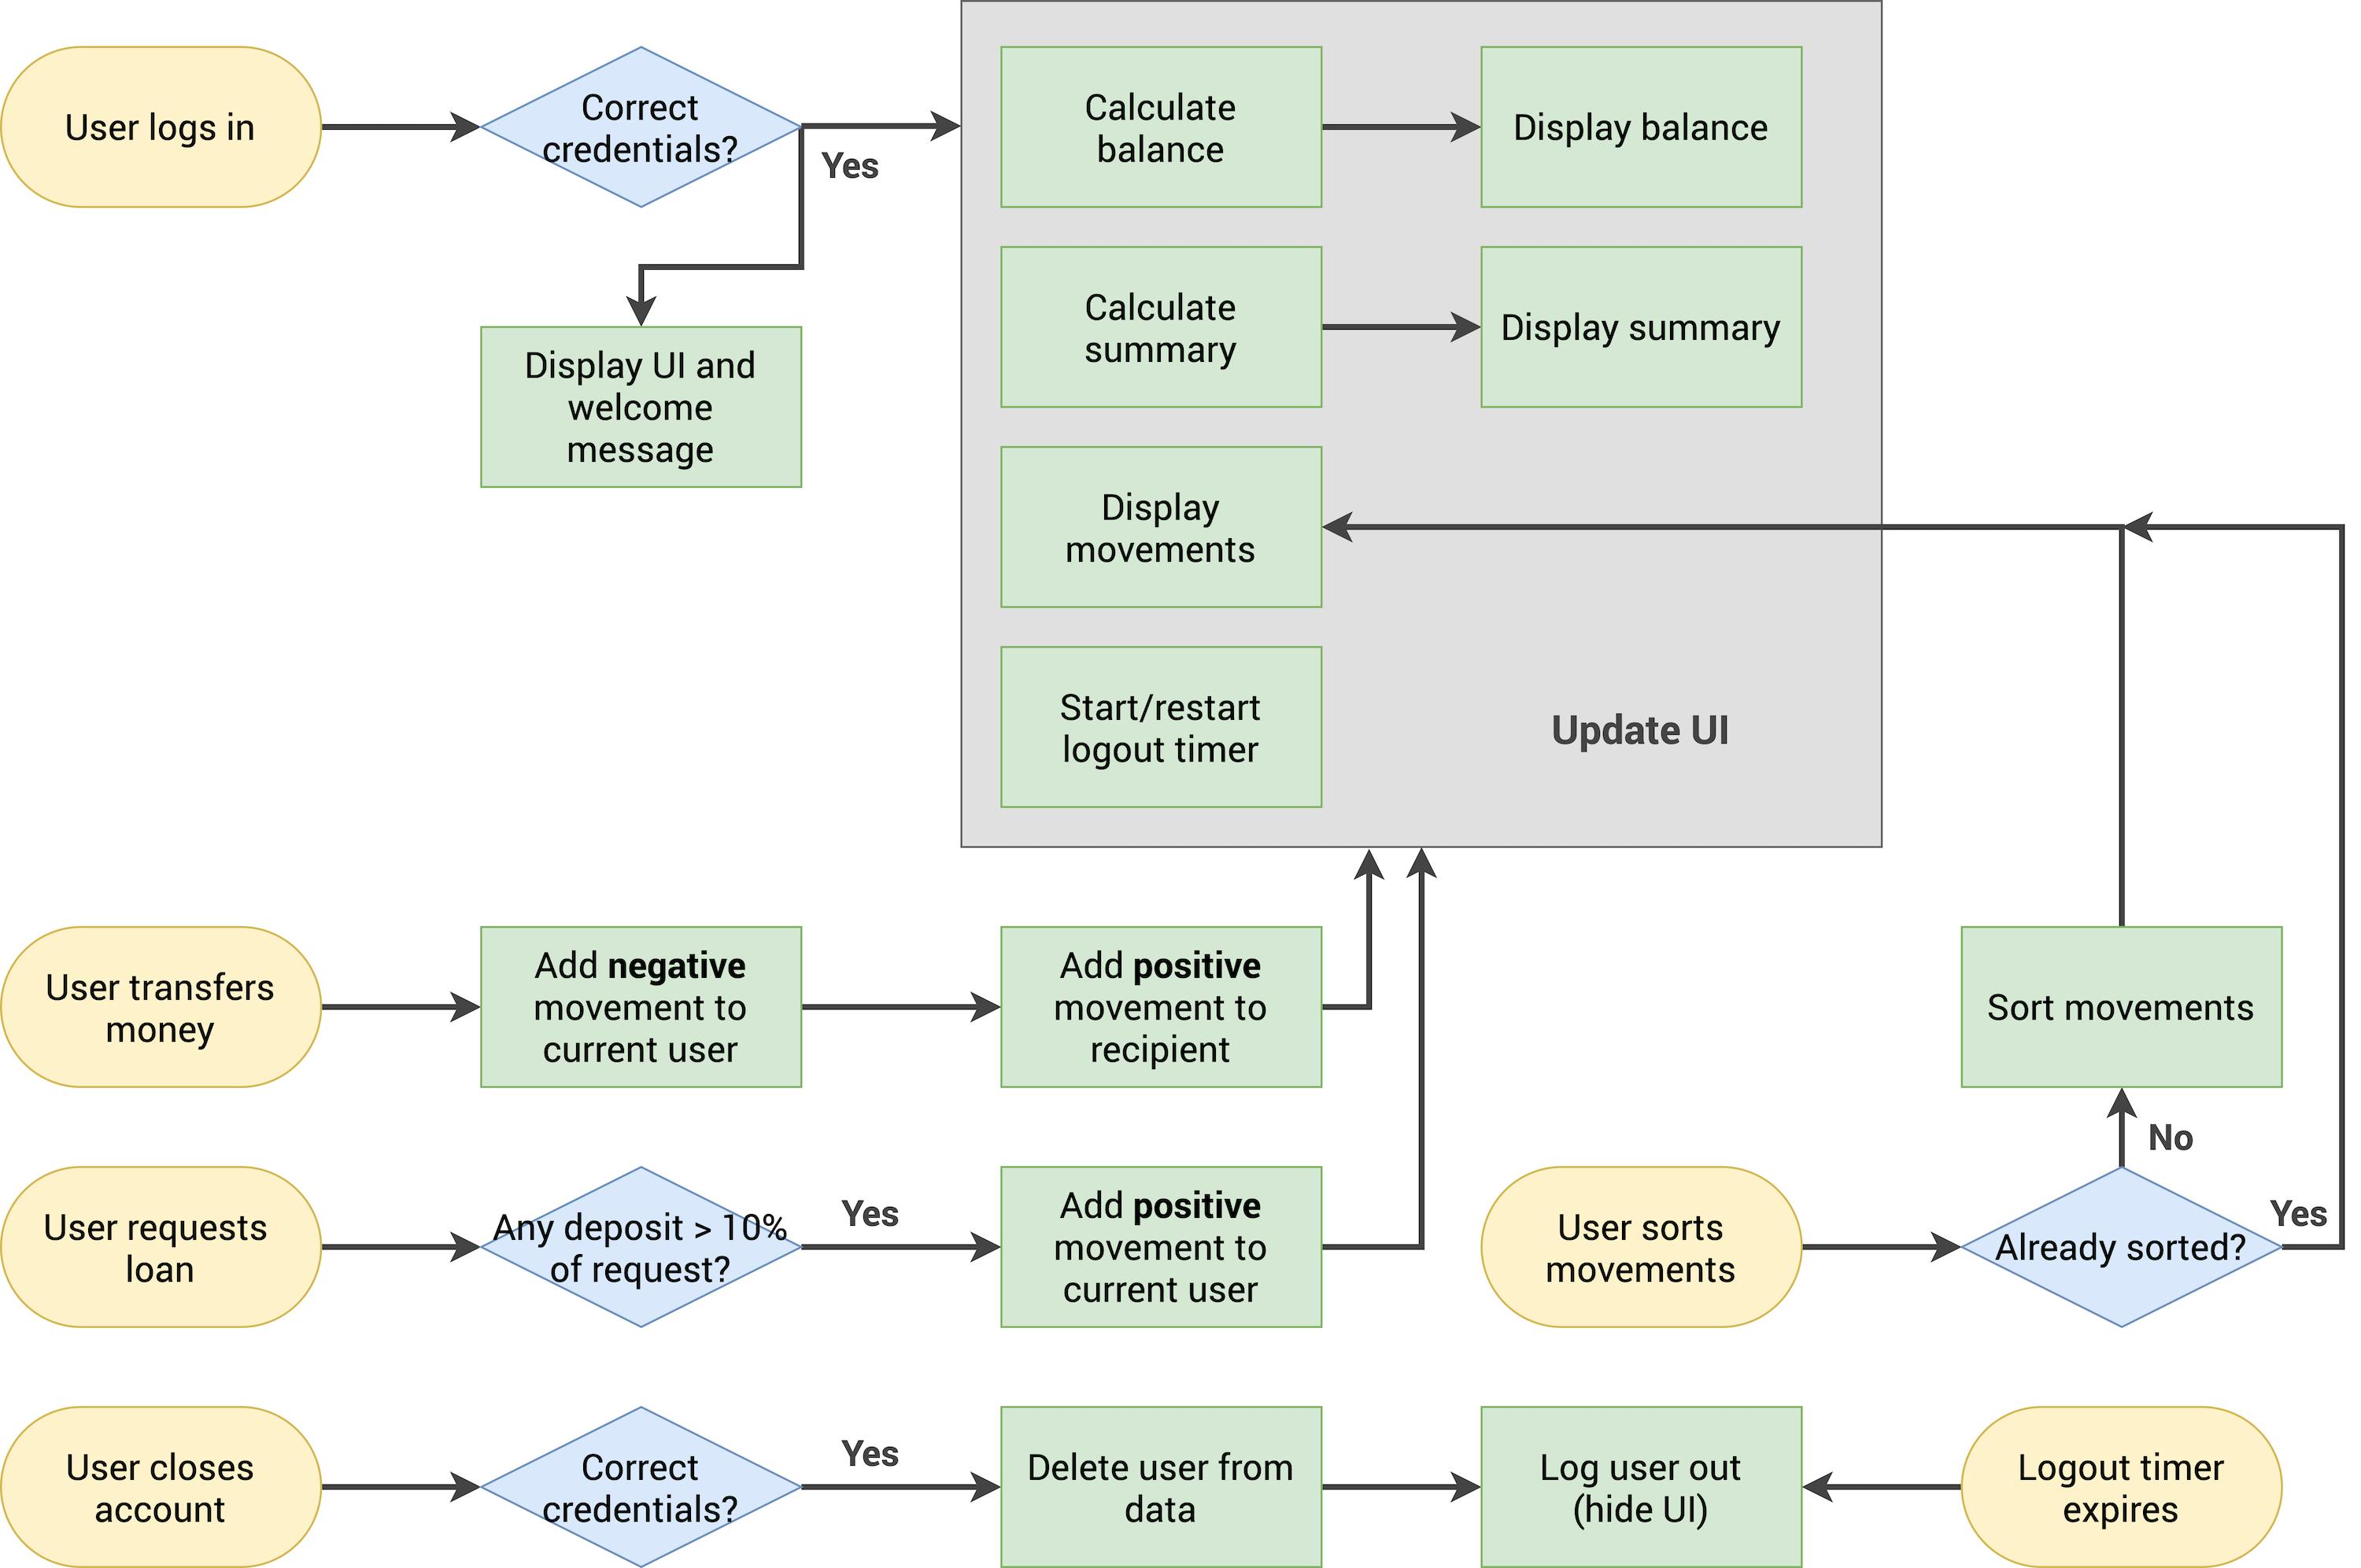
The project came with all of the elements written out as variables in the script using the DOM. The account information was provided as objects to simulate data retrieval from an API source or similar, and included information like the account owner, lists of movements and dates, pin number, and locale. The tasks included adding event listeners to all the interactive components of the app, including log in, requesting loans and transfers, and deleting the account. The first step was to compute the usernames using the full name provided and transforming that string using a function that takes in a list of the accounts and loops over them using the forEach() method. Code is as follows:
const createUsernames = function (accs) {
  accs.forEach(function (acc) {
    acc.username = acc.owner
      .toLowerCase()
      .split(' ')
      .map(name => name[0])
      .join('');
  });
};
createUsernames(accounts);
Next was implementing the login feature using an event listener to check if the username and pin matched the account information present in the account object. This required the use of optional chaining, the strict equality operator, and the find() method to see if the user is actually present. In the flowchart, you can see that if the credentials match up, a welcome message is displayed alongside the UI, which also involved DOM manipulation to change the opacity of the interface. There could have been some sort of error handling if the wrong credentials were given, but as this was not the goal of the app, instead nothing happens. This sort of functionality may be added later. Onto the next step...
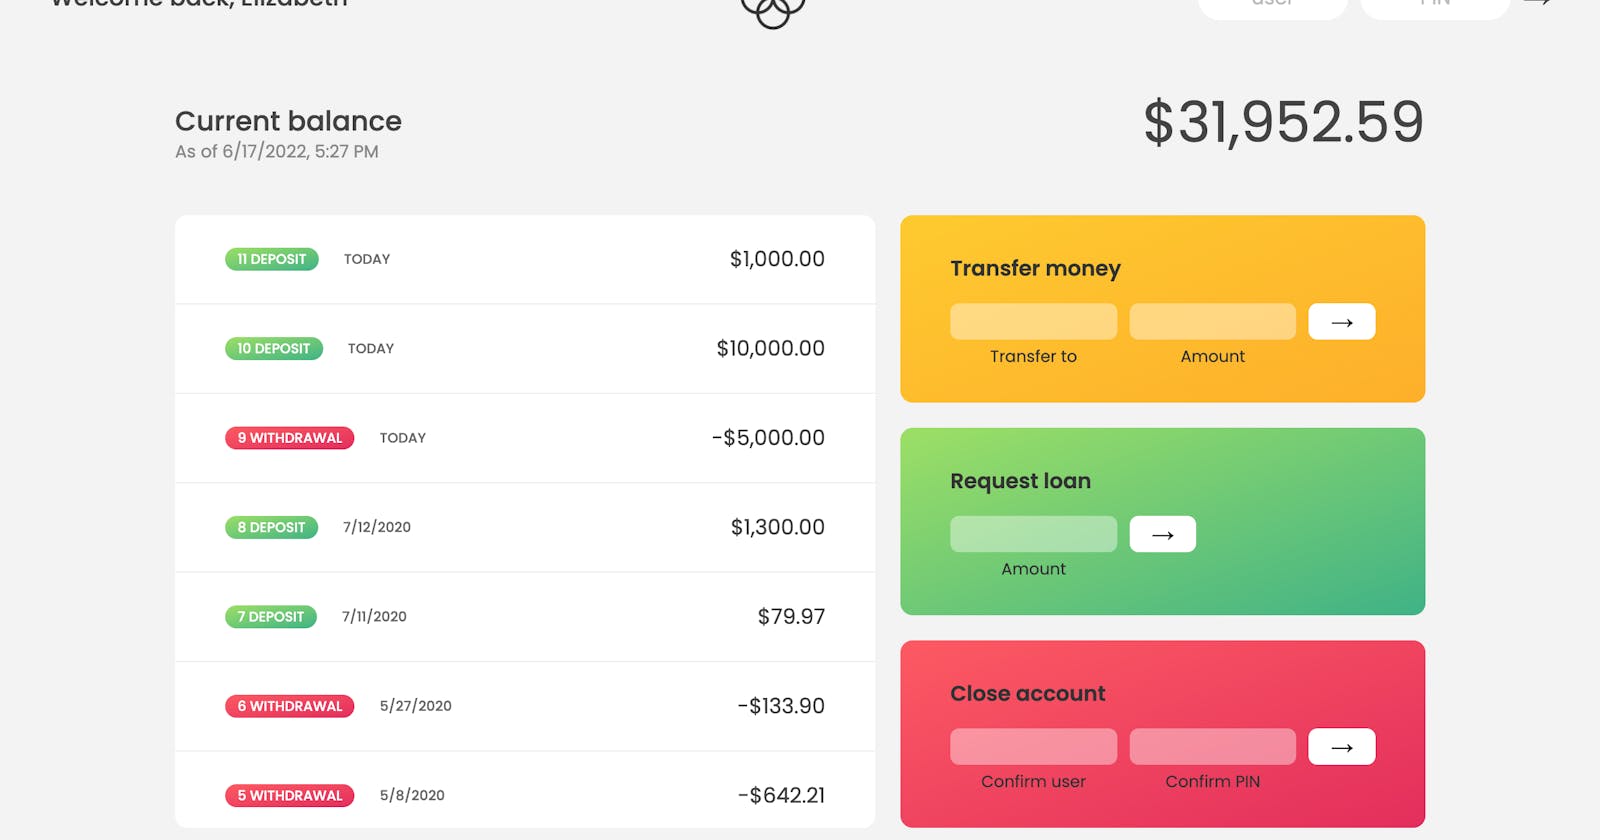
The UI then displays the balance of the account, using the list of movements that is provided as an array. The type of movement is displayed using a ternary operator, and when the "sort" button is clicked, it will sort the withdrawals/deposits in ascending or descending order based on a boolean value that is toggled each time it is clicked. The insertAdjacentHTML() method is called on a forEach() on each row using the 'afterbegin' parameter. Each row is dynamically created using HTML templating, which I thought was a clever use of JavaScript. Based on the value in the movements array, the app displays whether it is a deposit (mov > 0), or withdrawal (mov < 0), and calculates the balance from these values. The dates and currencies of each movement are formatted according to the account's locale and currency properties, which were already provided, but the full list of ISO language codes can be viewed here.
A timer was used to count down the time until the user is logged out, and also to simulate the time to receive a loan amount. In order to calculate the minutes and seconds until log out, a "time" variable was declared in the global parent scope set to 2 minutes (120 seconds) and was then divided by 60 (with Math.trunc() to avoid the use of decimals) inside of a startLogOut function to create a "minutes" variable, and the modulo (%) product was used to generate the seconds. If another user logs in or any activity occurs, the timer is reset using setInterval() and starts over again.
The app is not totally complete yet, as the UI/UX components are pretty bare bones; those will likely be added in future iterations. But as an introduction to numbers, dates and timers I am pretty satisfied with the results and wanted to share the process. We'll see how this app develops over time. And obviously since there is no form of encryption or databases, it's not a real bank app, but I think it's pretty cool nonetheless.
It is said that if you want to really understand something, explain it to someone else. That's the purpose of this post: to solidify my own understanding by explaining the process behind building this app. If you want to see the finished app, head on over to Netlify to play around with the finished product. The two accounts are:
es with pin 1111 and jd with pin 2222
Have fun! As always, I'll be posting my progress on Twitter as well if you want to follow along. Happy coding!
-Rose